Ah, the ombre cake – a true feast for the eyes and a surefire way to impress your guests. If you’re anything like me, you’ve probably scrolled through Instagram, drooling over those perfectly gradient-ed, multicolored masterpieces, wondering, “How on earth do they do that?” Well, my friends, the time has come to unveil the secrets of the ombre cake. Buckle up, because I’m about to take you on a delectable journey, from the basics of color theory to the art of assembling these visually stunning treats. By the end of this article, you’ll be whipping up ombre cakes that would make even the most seasoned pastry chef green with envy.
Understanding Color Theory for Ombre Cakes
Let’s start with the foundation – color theory. Ombre cakes are all about seamlessly blending hues together, so it’s crucial to have a solid understanding of how colors work. Think of it like painting a masterpiece – you can’t just slap a bunch of colors on the canvas and expect it to look cohesive. No, you need to carefully consider the relationships between the shades and how they’ll interact with one another.
The key to achieving that beautiful ombre effect is to choose colors that are close to one another on the color wheel. This means selecting shades that are analogous, or neighboring, on the wheel. For example, a cake that fades from deep purple to soft lavender would work beautifully, as would one that transitions from rich crimson to dusty pink. On the other hand, jumping from bright yellow to deep blue would result in a jarring, disconnected look.
But don’t take my word for it – let’s dive into a real-life example. Imagine you’re planning an ombre cake for a baby shower, and you want to incorporate soft, pastel hues. You might start with a pale mint green at the bottom, gradually blending into a delicate powder blue, and finishing with a whisper of baby blue at the top. The gentle gradation of these related colors would create a serene, calming effect, perfectly suited for the occasion.
Mastering the Ombre Cake Baking Process
Now that we’ve got the color theory down, it’s time to tackle the actual baking process. Ombre cakes may look complicated, but I promise you, they’re not as daunting as they seem. With a little practice and a keen eye for detail, you’ll be whipping up these showstopping creations in no time.
First and foremost, let’s talk about the cake itself. You’ll want to start with a classic, moist vanilla or white cake recipe as your base. This neutral canvas will allow the ombre effect to truly shine. Once you’ve mixed up your batter, it’s time to divide it into separate bowls, one for each color you want to incorporate.
Now, the tricky part – getting those perfect, seamless color transitions. This is where your food coloring skills come into play. Start by adding just a tiny bit of coloring to the first bowl, and then gradually increase the amount as you move up the color spectrum. Be sure to mix thoroughly after each addition, so the color is evenly distributed.
Once you’ve got your colored batters ready, it’s time to assemble the cake. Grease and line your cake pans, and then carefully spoon the darkest color into the bottom, followed by the next lightest shade, and so on. Resist the urge to swirl or mix the colors – you want those distinct, gradient-ed layers.
Bake your cakes as usual, and then let them cool completely before attempting to stack and frost them. This is where the real magic happens! Gently trim the tops of each layer to ensure they’re perfectly flat, then stack them up, making sure to keep the color gradation in order.
Now, for the frosting. I recommend using an American buttercream or a silky Swiss meringue buttercream as your canvas. Coat the entire cake in a crumb coat, and then smooth on the final layer of frosting, being careful to blend the colors seamlessly. Don’t be afraid to play around with different piping techniques, like swirls or smooth swoops, to enhance the ombre effect.
Decorating and Serving Your Ombre Masterpiece
You’ve made it this far, and now it’s time to put the finishing touches on your ombre cake. The options are endless when it comes to decorations, so let your creativity shine.
One of my favorite ways to accentuate the ombre look is to use fresh flowers. Just imagine a cascade of vibrant blooms, mirroring the gradient of the cake itself. Peonies, garden roses, and ranunculus all make stunning additions. Sprinkle a few petals around the base of the cake, or go for a more dramatic look by placing larger arrangements on top.
If you’re feeling extra fancy, you could also try incorporating edible gold or silver leaf. The way the light catches those shimmering flakes is simply mesmerizing. And don’t forget about the power of simple, yet elegant, decorations like sprinkles or a light dusting of powdered sugar.
When it comes time to serve your ombre creation, be sure to cut the slices carefully, preserving those beautiful color layers. Trust me, your guests will be in awe as you unveil each vibrant, gradient-ed piece. Pair it with a scoop of vanilla ice cream or a dollop of fresh whipped cream, and you’ve got a dessert that’s sure to impress.
Exploring Ombre Cake Variations
But wait, there’s more! Ombre cakes aren’t limited to just the classic color gradients. Oh no, my friends, the possibilities are endless. Let’s take a look at a few fun variations to try:
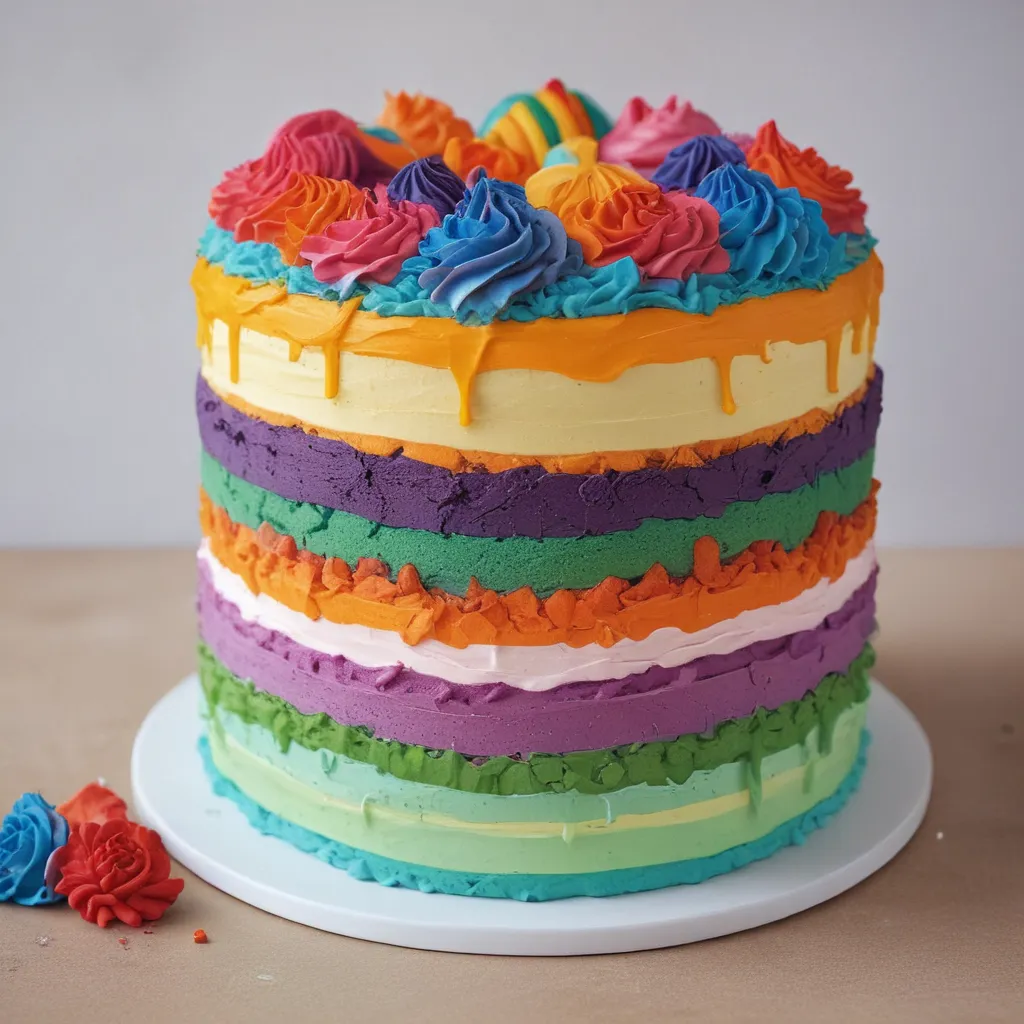
Ombre Buttercream Cakes: Instead of coloring the cake batter, you can create an ombre effect using colored buttercream. Start with a darker shade at the bottom and gradually lighten the frosting as you work your way up. This is a great option if you want to showcase a specific flavor, like chocolate or raspberry.
Ombre Drip Cakes: For a modern, trendy twist, try an ombre drip cake. Frost the cake in a neutral color, and then drizzle on a gradient of colored ganache or glaze. The way the colors cascade down the sides is simply mesmerizing.
Ombre Macarons: Why limit the ombre goodness to just cakes? Try your hand at ombre macarons, creating a beautiful gradient across the delicate shells. Serve them up in a pretty box for the perfect treat.
Ombre Cupcakes: If you’re short on time or looking to feed a crowd, ombre cupcakes are a fantastic option. Bake your cupcakes in the ombre color scheme, and then top them with a swirl of buttercream in a complementary hue.
The world of ombre cakes is your oyster, so don’t be afraid to get creative and have some fun with it. After all, baking should be an adventure, not a chore. So grab your whisk, preheat your oven, and let’s get to work on creating some truly stunning ombre masterpieces.
Troubleshooting and Tips for Ombre Cake Success
Now, I know what you’re thinking – “This all sounds incredible, but what if I mess up?” Fear not, my fellow bakers, I’ve got your back. Let’s tackle some common ombre cake conundrums and share a few tried-and-true tips to ensure your creations are nothing short of perfection.
First and foremost, let’s address the color issue. What if your layers just don’t blend together seamlessly? The key here is to be patient and take your time. Make sure you’re thoroughly mixing the food coloring into each batch of batter, and consider using gel or powder colorings, as they tend to be more vibrant and easier to control. If you’re still struggling, try lightly tinting the frosting in between the cake layers to help bridge the gaps.
Another common pitfall is uneven baking. This can lead to wonky, lopsided cakes that refuse to stack properly. To avoid this, be sure to use cake strips or bake your layers one at a time, adjusting the oven racks as needed. And don’t forget to level those cakes before assembly – a little trimming can go a long way.
Finally, let’s talk frosting. If you find that your buttercream is refusing to smoothly cover those gradient-ed layers, try chilling the cake for 30 minutes before frosting. This will help the layers firm up and provide a better canvas for your decorating. And don’t be afraid to use a bench scraper or offset spatula to get those silky-smooth sides.
Now, for some icing on the cake (pun intended) – a few extra tips to take your ombre cakes to the next level:
- Experiment with different color combinations and flavor profiles. Don’t be afraid to get a little adventurous!
- Consider using a tinted simple syrup to keep your cakes extra moist and flavorful.
- Invest in a good set of cake decorating tools, like piping bags and tips, to really elevate your designs.
- Have fun with it! Baking should be a joyful, creative process, so let your personality shine through.
At the end of the day, the most important thing is to enjoy the process. Ombre cakes may seem daunting, but with a little practice and a whole lot of passion, you’ll be whipping up showstopping masterpieces in no time. So grab your mixing bowls, preheat that oven, and get ready to impress your friends and family with your ombre cake prowess.
And if you’re ever in the San Jose area, be sure to stop by Jax Cake Shop to see what kind of ombre magic we’ve been cooking up. We’d love to chat with you about your own ombre cake dreams and maybe even whip up a custom creation together. Happy baking, friends!


